|
|
Date: |
August
18th, 2001 |
| Type: |
Review |
| Supplier: |
PCCaseGear |
| Author: |
mayhem |
Testing:
Firstly you should try the neon before you place your case back
on, that way if you have any problems you can fiddle around without
having to remove the case once again, or for those of you with modding
experience just go straight ahead and put it back together. Once
your ready fire up the computer so that the PSU is feeding power
to all the cables and devices within your PC and of course including
your new neon.
Now hold your
breath and flick the switch (those of you who select the switch-less
version should see the neons turn on as soon as the computer is
turned on), if all has gone well then you should see a nice bright
light shining through your window, I think you will agree with me
here that it makes a window kit so much more having this neon light
up all your hardware. (only thing is now you will have to keep the
inside of the computer dust free for maximum effect)


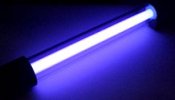
As you can
see by the above photos the two neons light up the area of the window
really well and give the case a nice blue glow. The above photos
where taken in the day and as you can see even in full day light
the neons are bright and very distinct, below is the night and all
you can see is the hole in the side of the computer with blue light,
give a strange feeling when using the computer in the dark but looks
awesome as the computer is no longer an eye sore.

Placing the
neon in a different location within the computer (as stated before)
will produce a different affect, and it is probably a good idea
to have a fiddle around with the light and how it looks before you
permanently attach it with the double sided velcro pads. Luckily
with two neons its alot easier to get right.

In the above
photo you can see the air vents at the back of the Aopen case we
used for this mod, the blue light from the neons comes out all of
the ventilation holes and makes even the back of the case look nice.
The only problem is that the bottom of this case has two holes drilled
in it (this is how it came) and the neon at the bottom of the case
shines through these two holes (as you can just make out in the
photo), to fix this we just tapped up the holes from underneath
the case, you may want to check all around your case and make sure
things seal up properly as a small crack or gap lets light come
through in unwanted places (i.e. around a CD-ROM or something at
the front of the computer).
Conclusion:
Made from high quality parts it comes with complete instructions
making installation a absolute breeze, this is always a benefit
when modding your case. The
dual neon itself is great, its nice and bright and gives off an
effective coverage of light in both night and day light. The only
problem that we noted was that one of the neons took a couple of
seconds (about 20) to fully power up, while the other turned on
instantly, after that both neons where nice and bright (maybe because
they are new and the phosphor is not properly burnt).
Priced at $49(AUS)
for the standard neon and $55(AUS) for the version with the wired
switch, these neon's are a great purchase for both effectiveness
and quality. Some people may think that the price is a little expensive,
but remember your getting two neon's in this kit basically and the
effect is a great deal better than that of the single neon kits.
For those of
you that are worried leaving this neon on will cause a general increase
in heat in the case, you have nothing to be worried about, after
leaving the neon for about 24hrs there was no noticeable increase
in the case temperature and the neon itself was barely warm (the
little power adapter was the warmest part, but still was nothing
to worry about), which makes me want to leave it on all the time.
I would like
to thank James Cameron from PCCaseGear
for kindly supplying this new dual neon kit for review, it has made
the window kit even more impressive and looks great.
Score:
9.5 / 10
FORUM: Talk
about this and other mods
|